
5 steps to covering silage pits for an airtight seal
 © Tim Scrivener
 With grass silage costing £150/t of dry matter to produce, no farm can afford to make mistakes when making, harvesting or clamping the crop.
High on that list is how it is covered, and with what, says silage expert Dave Davies.
This is because silage fermentation and preservation rely on creating an oxygen-free environment for bacteria to do their job.
“Good fermentation and aerobic stability depend on preventing oxygen from entering the pit.
This is where I often see it go wrong, because at this stage in the silage-making process farmers are often rushing to just get the job finished,” says Dr Davies, of Silage Solutions.
See also: How to prepare for the 2023 silage-making season
“If you have done a good job of covering the pit, the top sheet should blow up like a bouncy castle within the first couple of days because you are sealing in the carbon dioxide.
Therefore, it becomes very anaerobic very quickly and that stops all the aerobic processes,” he adds.
Dr Davies worries that environmental concern about using plastic in the silage-making process is now such a barrier that farmers are cutting corners in how much they use.
But if silage is not sealed properly, losses can amount to 25-30%, he points out.
“Silage that has that degree of waste has a huge carbon footprint and a big economic cost, so if you are going to reduce polythene, do it knowing you will need to use a different approach.”
Dr Davies gives his tips on how to cover the clamp to get an airtight seal and good fermentation.
© Tim Scrivener
1. Never skimp on side sheets
Side sheets are essential because without them it is impossible to get a good seal between the top and sides of the clamp.
Skimp on this bit and you will always get waste on the shoulders of the clamp, as concrete walls are porous, which means oxygen can pass through them easily.
Cover the entire wall, from top to bottom, and allow for at least two metres of excess sheet at the top so it overlaps with the cling film barrier and top sheet.
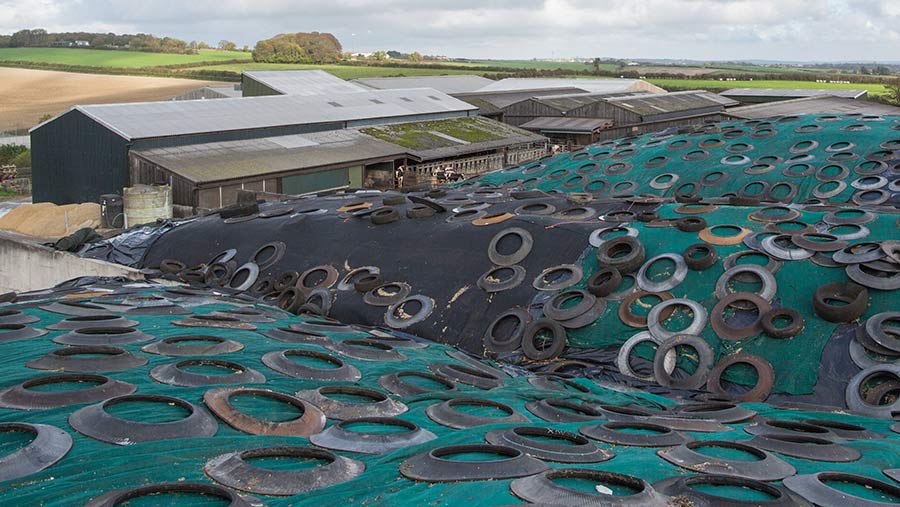
2. Use plenty of gravel bags
Place gravel bags all the way down the sides, the ramp and front to hermetically seal the clamp.
Ensure the gravel bags are touching, with no gaps – this will prevent carbon dioxide from seeping out, creating a vacuum under the sheet and sucking in oxygen.
3. Place as much weight as possible on the top of the clamp
The purpose of weighing down the top sheet is to maintain good density on what is the weakest part of the clamp.
This will prevent oxygen from entering the clamp.
4. Pay attention to the ramp
Make sure there is at least half a metre of extra silage sheet at the front of the clamp and weigh it down well around the edge.
Sealing the ramp properly will result in 5% more silage.
5. Use cling film sheets
All farmers should use cling film on top of their silage.
It is hugely beneficial because it folds to the contours of the pit and clings down very quickly. It reduces the risk of oxygen getting in by creating a self-sealing layer and the anaerobic conditions silage needs for an efficient fermentation process.
Cling film with an oxygen barrier is better because it also reduces direct oxygen permeation through the plastic sheeting, but it is more expensive than standard film.
It does a very good job, though, and you will see a return on that investment, but only if you do everything right.
What to use to weigh down the clamp
There are many options for weighing down the clamp, each with their own pros and cons, according to silage expert Dave Davies.
Rubber mats
Advantages
- They add a significant amount of top weight at an even distribution
- Birds cannot peck through them
- As they are modular, they can be positioned with no gaps
- Good lifespan
Downsides
- They are heavy and costly compared with old tyres
- As they are heavy to handle, they require a good system for storage when they are removed at feeding
- A telehandler with pallet forks generally needs to be used for that job
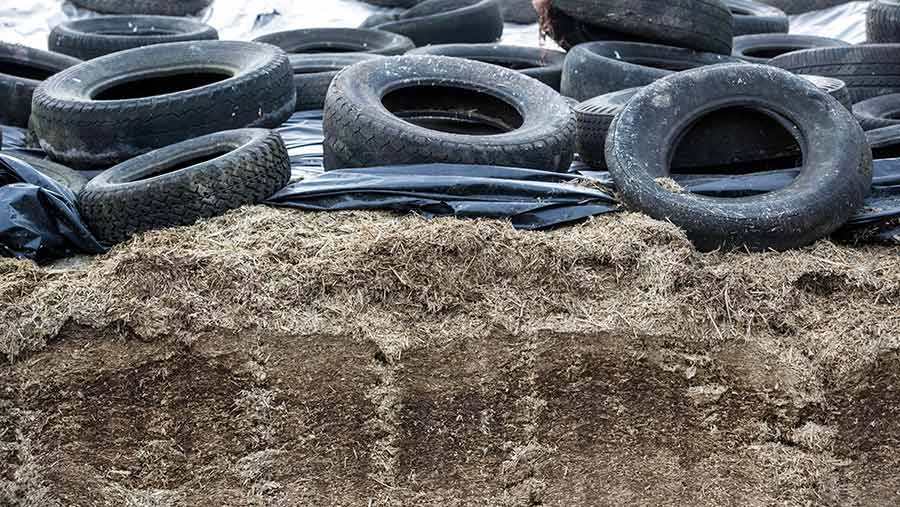
Tyres
Tyres are probably still the most common method for providing weight to hold the sheet in place.
Advantages
- If they are in good condition, their smooth edges reduce the likelihood of the sheet getting punctured when they are being placed
- It reuses a product that is no longer fit for its principal use
Downsides
- Disposing of them when they are no longer needed comes at a cost and is controlled by regulation, but this can be balanced against their cheap or even free upfront cost
- They only provide partial pressure on the surface of the sheet, and this can result in silage spoilage
- There is also the potential of leakage through the sheet caused by low spots that retain rainwater
- Tyres can be difficult to store efficiently and take up quite a bit of space
- Dirty to handle
Mesh
Heavy-duty covers made from polythene can be used to anchor the top sheet.
Advantages
- Some covers come with built-in hoops to attach bags to prevent them from sliding off the face or sloping sides
- If they are handled with care and correctly stored, covers can last for 10 years or more
Disadvantages
- They must be used in combination with other weights. They are meant to prevent bird damage, but this relies on placing them on top of a layer of tyres so the birds cannot peck down through the sheet
- Gravel bags should be placed around the edges of the mesh to hold it in place and to ensure tension is maintained across the whole surface of the clamp
Gravel bags
Advantages
- Low cost
Disadvantages
- Many brands come unfilled, and filling them can be a time-consuming job
- Bags can be prone to vermin damage, so choose a brand made from durable material
Straw bales
Advantages
- If the pit is under cover, rectangular straw bales are a good option
- Barley straw is preferable, as you are more likely to puncture the sheet with wheat straw
Disadvantages
- Not good for outdoor clamps because the bales will get wet
Sand
Advantages
- Cheap
Disadvantages
- Removing it is challenging
- It can get mixed with silage
Puncture-proof thick fleece
A new generation of top cover was launched last year, made from a breathable, waterproof polypropylene fleece.
Advantages
- It is tear-resistant and has a textured, non-slip surface
- At 500g/sq m, it is heavy enough for top weight
- Can be bought in sections and joined together to make it easier to handle
- Only an oxygen barrier is needed underneath – no black sheet – so it will significantly reduce waste plastic
Disadvantages
- Expensive
Verdict?
“If money was no object, my gold standard would be an oxygen barrier with a black sheet on top and on the sides and topped with mats, and with gravel bags touching all the ways down the sides and the ramp,” says Dr Davies.